Showing posts with label CAS Challenges. Show all posts

June 27, 2012

These are the two cards I made for this week's clean and simple challenge on splitcoast stampers which was a sketch challenge.  This is such a great sketch to work with and so I decided to get a head start on some Christmas cards for this year.

I stamped the ornaments and punched them out using the ornament punch, so easy!  I did stamp and punch out one of the snowflake type images (the one in the center of the green ornament).  I also added a rhinestone in the center of each ornament.

Then I added my ribbon and stamped my sentiment.  This would be a perfect card to reproduce for your holiday cards because it's quick and easy to make.  I should have made a few more of these myself.

*card #20 out of 100 cards in 100 days goal

Stamps:  Delightful Decorations, Curly Cute
Card Stock:  Very Vanilla, Designer Series Paper Be of Good Cheer
Ink:Raspberry Ripple, Gumball Green
Supplies:  Ribbon, Ornament Punch, 3/4" Circle Punch, Rhinestone Basic Jewels, Stamp-a-ma-jig


The stamp I used on this card is a current hostess set.  I love the sentiments in this set.  I simply stamped the sentiment and layered it and then assembled my card.

I used the dotted scallop ribbon border punch for the certainly celery card stock towards the bottom of my card and for my ribbon treatment I just tied on my ribbon and then I decided to add a bell and I tied it in the center of my bow using some twine.   It's hard to see in my photo, but I added a rhinestone jewel just above the letter i in the word Christmas.

Make it a good day!

*card #21 out of 100 cards in 100 days goal

Stamps:  Wacky Wishes- current hostess set
Card Stock: Very Vanilla, Certainly Celery, Designer Series Paper Be of Good Cheer
Ink: Raspberry Ripple
Supplies:  Ribbon, Twine, Jingle Bells, Dotted Scallop Ribbon Border Punch, Rhinestone Basic Jewels

Contact me today if you would like to place an order or to be added onto my mailing list!
To place your Stampin' Up! order- http://www.stampinup.com/ECWeb/default.aspx
My email address- pebbles4@ptd.net
Pin It

June 25, 2012


Is it Monday again already?!!  Where did the weekend go?  I was busy getting our yard cleaned up and getting some things done for our party.  I'm a bit behind my 100 cards in 100 days goal so I have some catching up to do today.

This is the card I made for today's splitcoast clean and simple challenge.  The challenge was a sketch challenge, which is my very favorite CAS challenge.  The sketch was based on this card here made by Miss Minx.  I loved this sketch so much that I ended up making two more cards (I'll post them later in the week).

This stamp set that I used isn't released yet so you are getting a sneak peek!  This Stampin' Up! stamp set is called 'Reason to Smile'.  I stamped the flower image and colored it using my SU markers.  My background is stamped using wisteria wonder ink and two flower stamps (from this same set).

My white border along the bottom of my card was cut using the adorning accents edgelits and I added a row of piercing using the new essentials paper piercing pack.  My sentiment was stamped and cut using the bitty banners framelits.

I hope you liked my card!  Thanks so much for stopping by!  Have a great evening!

*card #17 out of 100 cards in 100 days goal

Stamps:  Reason to Smile, Itty Bitty Banners
Card Stock: Wisteria Wonder, White, Certainly Celery, Subtles, Designer Series Paper Stack
Ink:  Black Stazon, Wisteria Wonder
Supplies: Ribbon, Big Shot, Bitty Banners Framelits, Adorning Accents Edgelits, Essentials Paper Piercing Pack, Paper Piercing Tool, SU Markers
Technique:  Paper Piercing

Contact me today if you would like to place an order or to be added onto my mailing list!
To place your Stampin' Up! order- http://www.stampinup.com/ECWeb/default.aspx
My email address- pebbles4@ptd.net
Pin It

June 18, 2012

Good morning!  Today's clean and simple challenge on splitcoast stampers is an inspiration challenge based on the black and white swim suit photo below. 

Wish I looked that good in a swim suit....LOL  but anyway...I did some dry embossing on the upper portion of my card and I used my scallop trim border punch to sort of mimic the ruffles on the swim suit.

I tried to work in some black towards the bottom of my card since the bottom half of the swim suit is black.  Black and white cards are perfect for weddings and so I thought this would make a lovely wedding card. 

I used the stamp set called Four Frames and I stamped the newlywed sentiment inside the frame.  My sentiment is from the set Teeny Tiny Wishes- If you looking for a new sentiment stamp set I have to recommend this set, I find myself using it all the time.

I'll be back later with a few more cards to post today.  I want to catch up on my 100 cards in 100 days goal.

*card #11 out of 100 cards in 100 days goal*

Stamps:  Four Frames, Teeny Tiny Wishes
Card Stock:  White, Black
Ink:  Black Stazon
Supplies:  Ribbon (retired), Big Shot, Elegant Lines Embossing Folder, Scallop Trim Border Punch, SU Black Marker, Stamp-a-ma- jig
Technique:  Dry Embossing, 2 Step Stampin'

Contact me today if you would like to place an order or to be added onto my mailing list!
To place your Stampin' Up! order- http://www.stampinup.com/ECWeb/default.aspx
My email address- pebbles4@ptd.net
Pin It

June 17, 2012


Hi everyone!  I hope you had a wonderful Father's Day.  My kids made breakfast in bed for daddy and my husband enjoyed his English muffin, coffee, and the news paper delviered to him.  Of course he heard us in the kitchen getting it ready, but we do it every year and so I think he sort of expected it.

I wanted to make a card for last week's splitcoast clean and simple challenge and just tonight I set aside some time to see what I could come up with.  The challenge was to create a card using a white card base with a white card front.  White cadrs always make such pretty wedding cards and so that's what I decided to make.

I began by stamping my heart image on my card base layer and then I embossed the bottom half of that layer using my perfect polka dots embossing folder and just above my embossed area I added 2 rows of dry embossing using my simply score board. 

The next layer I cut to size 4 1/4" x 3 1/4" and then I punched out the circle using my 1 3/4" circle punch.  Then I ran the upper portion of this layer through my big shot machine using my vintage wallpaper embossing folder and just below the embossed area I again added 2 rows of dry embossing using my simply score tool.  I added my sentiment just below my score lines.

The ribbon and silver cording I used is retired Stampin' Up ribbon and cording!  I still have some left over from when I made my wedding invitations several years ago.

Well, that's about it for tonight!  Thanks so much for stopping by!  See you tomorrow!

*card #10 out of 100 cards in 100 days goal*

Stamps:  Wedding Elegance, Occasional Quotes
Card Stock:  White
Ink:  Basic Gray
Supplies:  Big Shot, Vintage Wallpaper Embossing Folder, Perfect Polka Dots Embossing Folder, 1 3/4" Circle Punch, Organdy Ribbon, Silver Cording, Dimensionals, Stamp-a-ma-jig, Simply Score Tool
Technique: Dry Embossing

Contact me today if you would like to place an order or to be added onto my mailing list!
To place your Stampin' Up! order- http://www.stampinup.com/ECWeb/default.aspx
My email address- pebbles4@ptd.net
Pin It

April 9, 2012

Good Morning! I hope everyone had a wonderful Easter! Today's card is for the clean & simple challenge on splitcoast stampers in which we were to find ways to use scallops and also for the CAS-ual Friday's challenge found here which we were to create a CAS card using something that you would find in an Easter basket.

My kids loved finding the eggs left by the Easter bunny yesterday. The eggs were hid throughout our house and in the yard at grandma's house, plus my kids had chocolate bunnies in their baskets and so that was the inspiration for my card today.

My card took me only about 10 minutes to make from start to finish! It was real easy to make and it was just a matter of stamping the images and cutting them out. I stamped and cut out the bunny because I wasn't quite sure what I was doing with him, but if I were to recreate this card I would just stamp him on my card. Then all you need to do is stamp a few eggs, but those out, and make the grass.

I used my scallop border punch to punch along the top edge of my green designer series paper and then using my paper snips I simply cut some small slits to resemble the grass. Next, I added my ribbon and adhered it to my card base. Super easy!

Thanks for stopping by! Have a wonderful day!

Stamps: Chocolate Bunny, Well Scripted
Card Stock: White, Designer Series Paper Patterns Stack - Subtles Collection
Ink: Chocolate Chip, Daffodil Delight, Pretty in Pink, Bashful Blue
Supplies: Ribbon, Scallop Border Punch, Scissors, Stamp-a-ma-jig

Contact me today if you would like to place an order or to be added onto my mailing list!
To place your Stampin' Up! order- http://www.stampinup.com/ECWeb/default.aspx
My email address- pebbles4@ptd.net
Pin It

April 1, 2012

Hi everyone!  I love the challenge this week on the CAS-ual Friday blog!  If you have time be sure to stop on over and check it out!  Here is the link for the challenge.  The challenge this week was to create a clean & simple card based on a song.  With Easter being only a week away I've had this song on my mind-
Here comes Peter Cottontail
Hoppin' down the bunny trail,
Hippity hoppity,
Easter's on its way

There's more to the song, but I just posted the first few lines.  Actually ever since I made my card I've been singing this song.  I began making my card by stamping my bunny image and then I stamped the image again onto some scrap blue designer series paper.  I used the paper piecing technique for the bunny's dress and the Easter basket.  If you are not sure what the paper piecing technique is you will find a great tutorial here.  The rest of the bunny was colored using my SU markers.  I left the bunny white and I simply colored ears, shoes, eggs in the basket, and the bow on the basket.

I used my scallop border punch along the dsp towards the bottom of my card.  I finished my card using pleated ribbon with twine tied on top of it.  I decided to thread my twine through my button and then tie it off with a bow and then I stamped the Easter sentiment.

Thanks so much for visiting!

Stamps: Everybunny
Card Stock: White, Twitterpated DSP
Ink:  Black Stazon
Supplies:  Twine, Pleated Satin Ribbon, Twitterpated Buttons, Scallop Border Punch, Scissors- for paper piecing the dsp, SU Markers- Blusing Bride, Certainly Celery, Daffodil Delight
Technique: Paper Piecing

Contact me today if you would like to place an order or to be added onto my mailing list!
To place your Stampin' Up! order- http://www.stampinup.com/ECWeb/default.aspx
My email address- pebbles4@ptd.net
Pin It

March 26, 2012

Hi everyone!  I was up late tonight making a card for this week's clean and simple challenge on splitcoast stampers found here.  The challenge this week was an inspiration challenge based on the cover of this Family Circle magazine.  I pulled out my 'create a cupcake' stamp set and my cupcake builder punch to make some yummy cupcakes.


My card was real easy to make.  The cupcakes were stamped and punched out and then all I did was assemble my card.  For my embellishments I decided to use ribbon tied with a knot and a small pretty in pink button with some twine tied through the center. 

My chocolate chip card stock layer was punched using my scallop border punch.  To create the cherry on the center cupcake I simply punched out one cherry using the cupcake builder punch and then I colored it using my SU markers, super easy!

Well, I hope you liked my card!  Be sure to stop by tomorrow, I have some exciting stamping news to share with you.  Have a great night!

Stamps:  Create a Cupcake, Sweet Little Sentiments
Card Stock: White, Chocolate Chip, Designer Series Paper Patterns Stack - Subtles Collection
Ink: Pretty in Pink, Certainly Celery, So Saffron, Perfect Plum, Chocolate Chip
Supplies:  Ribbon, Scrallop Border Punch, Button, Twine, Stamp-a-ma-jig, Create a Cupcake Punch, SU markers to color the cherry- Chocolate Chip, Real Red, Dimensionals
Technique: Punch Art, 2 Step Stampin'

Contact me today if you would like to place an order or to be added onto my mailing list!
To place your Stampin' Up! order- http://www.stampinup.com/ECWeb/default.aspx
My email address- pebbles4@ptd.net
Pin It

March 19, 2012


Good evening!  I'm a little late posting today, but I had company earlier today and so I'm just now getting some quiet time and today I made, not one, but two cards!  I made these cards for Monday's clean & simple challenge on splitcoast stampers and I also made these for Monday's technique lover's challenge on splitcoast stampers. 

The clean & simple challenge was a sketch challenge based on Angela's card found here.  This week's technique lover's challenge was to crop and image.  Both flower images on my cards are not the full image and were cropped.


I colored my stamp using my Stampin' Up! markers - old olive and melon mambo and then I stamped it onto my card stock.  The bottom of my melon mambo card stock layer was punched using the scallop trim border punch and I added some white twine tied through an old olive button.

I did a bit of dry embossing on the left side of my card.  I used the scallop adorning accent embossing folder and I actually ran it through my big shot twice (once for each row).  If you try this, I wanted to give you a tip- when you run your card stock through your big shot a second time your first embossed impression may become flattened a bit.  To fix this you can either gently work from the back side using your scoring too and push your raised embossed area back up or what I did was to align my embossing folder over top of my first embossed row and using my hands I pressed the folder together and that will raise up your embossed areas again- it worked out pretty well. 

Stamps:  Just Believe, Loving Thoughts
Card Stock:  White, Melon Mambo, Basic Gray
Ink: Going Gray
Supplies:  Big Shot, Adoring Accents Embossing Folders, Twine, Button, Scallop Trim Border Punch, SU Markers
Technique: Dry Embossing

And this is my second card I made for the same challenges.  I actually had this card made before I saw the technique challenge was to use a cropped image, how lucky was that?...LOL 

I colored my stamp using my Stampin' Up markers- old olive, daffodil delight, and basic black.  Then I stamped my image onto my card stock.  I used my eyelet border punch to punch a small border using old olive card stock. For my ribbon treatment I decided to add a button with some twine tied through the center.  I ended up using my glue gun to adhere the button onto my card.  Sometimes I'll use my glue gun when I want to make sure that the buttons will not fall off.  Glue dots work well too, but in this case my ribbon is satin and I was worried it wouldn't hold.

I did a little bit of dry embossing on this card as well.  Using my simply scoring tool I just added a few straight score lines.  This is a great way to add a little bit of texture to your cards and it only takes a minute or to score a few lines.

Well, that's about it for tonight.  I hope you liked my cards!  See you tomorrow!  Have a great rest of the night!
Stamps:  Inspired By Nature, Loving Thoughts
Card Stock:  White, Old Olive, Black, Daffodil Delight
Ink:  Black Stazon 
Supplies:  Ribbon, Button, Twine, Glue Gun, Simply Scoring Tool, Eyelet Border Punch, SU Markers
Technique: Dry Embossing

Contact me today if you would like to place an order or to be added onto my mailing list!
To place your Stampin' Up! order- http://www.stampinup.com/ECWeb/default.aspx
My email address- pebbles4@ptd.net
Pin It

February 27, 2012

Happy Monday!  Gee, didn't the weekend just fly by?  It did for me, but I made sure to take a few minutes today to make a card for the clean & simple challenge on splitcoast stampers.  Today's challenge was a color challenge and we were to create a card using only white and rich razzleberry.  Whew...what a challenge!  But I think I did okay with this card.

I began making my card my stamping my images.  I used a retired set called Watercolor Trio.  This is one of my very favorite retired stamp sets.  It looks like one big large flower image on my card, but it's really not.  Using my stamp-a-ma-jig, I stamped the flower/leafy images from this set using rich razzleberry ink.

Next, I cut and embossed my rich razzleberry layer, added my ribbon, adhered it to my card and then I added a few white dots using my white gel pen.  I decided I wanted to add a button (with a piece of twine tied in the center) on top of my ribbon knot (I used my glue gun to adhered the button).  Lastly, I stamped my birthday sentiment and I added a few Rhinestones Jewels beneath it.  (Sorry about making so many birthday cards lately, I'm trying to replenish my birthday card stash- for me there are a ton of birthdays this time of year).

In case you are looking at my supply list below and wondering where I used the glue dots I wanted to explain.  By the way, I love glue dots and I use them all the time.  They are especially good to use under an embossed layer because sometimes snail adhesive just isn't enough.  Well, that's about it for today!  I'm off to get some of my house work finished.  I can't let hubby think all I do is stamp and blog all day long! 

Stamps: Watercolor Trio
Card Stock: White, Rich Razzleberry
Ink: Rich Razzleberry
Supplies:  Ribbon, Button, Twine, Big Shot, Final Press Embossing Folder, White Gel Pen, Rhinestones Jewels, Scallop Trim Border Punch, Glue Gun, Glue Dots, Stamp-a-ma-jig
Technique: Dry Embossing

Contact me today if you would like to place an order or to be added onto my mailing list!
To place your Stampin' Up! order- http://www.stampinup.com/ECWeb/default.aspx
My email address- pebbles4@ptd.net
Pin It

February 20, 2012


Happy Monday!  Today I am trying to catch up on some of the blog challenges for the blog group that I belong to.  I also wanted to make a card for this week's clean & simple challenge on splitcoast stampers.

So this is a first for me, or I guess you could say this is unusual for me.  I rarely combine so many challenges into one card.  I don't know why, I guess I'm really not that great at finding several challenges that work together for me.  I'm always amazed when I see bloggers with like 10 challenges that fit into one card.  LOL

But anyway, the three challenge that my card is for are:  My blog group challenge was to make a card using green and purple and this week's blog group challenge was to make a card with some sort of bling- silver paper, glitter, glimmer mist, etc.  The third challenge I made this card for was for this week's CAS challenge to create a card using stitching.

I decided to use my SU Mixed Bunch stamp set and create a one sheet wonder card.  I'm sure you've read about me making one sheet wonder cards before, but just in case you didn't I'll briefly explain how to make them.  Basically, all you do is to take a sheet of neutral card stock and using your stamps you stamp all over.  The trick to this is to try and keep your images close together.  To make the card I am showing you today, I just took a piece of scrap card stock and I stamped all over it.  You really don't need to stamp an entire sheet of card stock, unless of course you would want to make several cards.

Once my card stock was stamped I layered my card onto my purple layer, I did my faux stitching, and then I added a punched border along the bottom.  My image panel was placed on my card using dimensionals.  I added the dimensionals because the backs of the brads are pretty big and I didn't want my card to have the bumps in it from the brads.  The dimensionals raised my panel up just enough that the brads really aren't an issue now. 

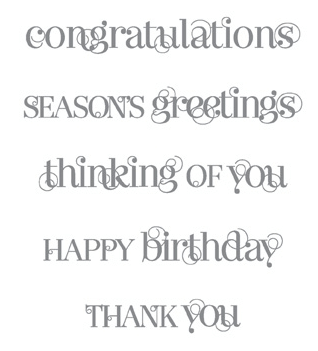
Lastly, I added my birthday sentiment (I decided to make this a birthday card because it seems as though I'm always in need of birthday cards around this time of year).  The sentiment is from the Stampin' Up! stamp set Curly Cute.  I love this sentiment stamp set because it's has really nice sentiments in it that I would definitely use on a regular basis. 

I'm posting a photo of the two stamp sets I used (in case you wanted to see them).

Mixed Bunch Clear Mount Item # 125537 - $21.95     Mixed Bunch Wood Mount item # 125535 - $27.95

Curly Cute Clear Mount Item # 120510 $14.95   Curly Cute Wood Mount Item # 117014 $19.95

Well, that's about it for today!  Thanks so much for stopping by!  Have a great day!

Stamps: Mixed Bunch, Curly Cute
Card Stock: White, Perfect Plum, Wild Wasabi
Ink: Perfect Plum, Wild Wasabi
Supplies: SU Mat Pack, Paper Piercing Tool, White Gel Pen, Large Brads, Scallop Trim Border Punch, Stamp-a-ma-jig, Dimensionals
Technique: One Sheet Wonder, Faux Stitching

Contact me today if you would like to place an order or to be added onto my mailing list!
To place your Stampin' Up! order- http://www.stampinup.com/ECWeb/default.aspx
My email address- pebbles4@ptd.net
Pin It

November 6, 2011


Happy Monday! I just wanted to take a minute to say thank you for being patient with me. This past week has been real busy and I wasn't able to update like I wanted to so today I am posting early. Also, thank you to all of my new followers and don't forget that once I reach 200 followers I will be giving away a new Stampin' Up! Simply Score Tool to one of you.  If you aren't sure what I am talking about, please see my blog post found here--->click on this link here.

I saw the clean & simple challenge posted on Splitcoast stampers and I knew right away what card I was going to make.  I just ordered this stamp set because I knew it would make lovely Christmas cards.  If you just beginning to stamp this card is perfect for you since you wouldn't need to purchase a lot of items plus this card is so easy to make.  It only took me about 5 minutes to make and if you leave off the pearls it would be perfect for mailing. 


I used the Bells & Boughs stamp set to create my card.  I stamped the larger poinsettia stamp in two of my corners using old olive ink and then I stamped it again just at the edge of my corners using cherry cobbler ink.  My sentiment was stamped using cherry cobbler ink and then I simply added three tiny pearls.  I also decided to use my cherry cobbler marker and put a few dots in the centers of the old olive poinsettis and that was it- super cute, quick, and easy.   

I hope you liked my card today.  I have quite a few projects ready to share with you all the next few weeks so be sure to check be when you can.  Make it a great day!

Stamps: Bells & Boughs
Card Stock: Cherry Cobbler, Very Vanilla
Ink:  Cherry Cobbler, Old Olive
Supplies: Pearls, Stamp-a-ma-jig, SU Cherry Cobbler Marker

Contact me today if you would like to place an order or to be added onto my mailing list!
To place your Stampin' Up! order- http://www.stampinup.com/ECWeb/default.aspx
My email address- pebbles4@ptd.net
Pin It

October 24, 2011

I hope you all had a wonderful weekend!  Saturday my family and I spent the day in a corn maze and picking pumpkins.  It's hard to believe fall is here already and in my back yard the leaves on the trees have already changed their colors and most have fallen. 

And that was sort of the inspiration for today's card that I made for the CAS (clean & simple) challenge on splitcoast stampers.  Today's challenge is a sketch challenge based on this card here.

I used a technique called thumping to color in this lovely tree image.  I began by using several fall SU colored markerd and then I started to color the leaves.  Once the leaves were colored I began thumping over the them with the same color markers I was using.  That's how I was able to create two different colors on the same leaves- it looks more realistic and fall like.  Once I was finished with my thumping I used my chocolate chip marker to again color the brown tree trunk and branches.  And remember to 'huff' onto the stamp before stamping it onto your card stock.  This remoisted the ink.  The Stampin' Up! markers I used were:  old olive, more mustard, tangerine tango, cherry cobbler.

The top half of my background is embossed using my vintage wallpaper embossing folder and just under my embossed area I added two score lines.  And that's about it for today's card.  I hope you liked it! 

Don't forget about my Simply Score Tool giveaway- you will find more information about that --->; click here.

Thanks for visiting.  I'd love to have you follow me  :)  Thanks & have a wonderful day!

Stamps: Leaves of a Tree, Whimsical Words
Card Stock: White, Chocolate Chip
Ink: Chocolate Chip
Supplies: Ribbon, Simply Score Tool, Stamp-a-ma-jig, SU Markers, Big Shot, Vintage Wall Embossing Folder, Coluzzle
Technique: Dry Embossing, Thumping

Contact me today if you would like to place an order or to be added onto my mailing list!
To place your Stampin' Up! order- http://www.stampinup.com/ECWeb/default.aspx
My email address- pebbles4@ptd.net
Pin It

October 13, 2011


Hi everyone! As I promised you the other day here is a Christmas card I made for a recent clean & simple challenge on splitcoast stampers. The challenge was to find ways to use paper piecing. I haven't used this stamp set in a long time. I have to admit I even forgot I had this set.

My tree was paper pieced by stamping the image onto the certainly celery designer series paper and cutting it out and then I added a few brads. The tree trunk was also paper pieced using chocolate chip card stock.

I very rarely use the paper tearing technique, but I thought it looked nice on this card. Simply tear the paper in one direction. You will notice that when you are tearing your paper one side will have more white showing than the other. I usually use the half that has more of the white showing.

My tree image is popped up using dimensionals and my sentiment is from the Stampin' Up! Occasional Quotes stamp set.

Thanks for stopping by! Have a great day!

Stamps: Sew Seasonal, Occasional Quotes
Card Stock: White, Certainly Celery, Real Red, Chocolate Chip, Stampin' Up! dsp
Ink: Black Stazon
Supplies: Ribbon, SU Mat Pack, Paper Piercing Tool, Hole Punch, Brads, Ticket Corner Punch, Stamp-a-ma-jig, dimensionals
Technique: Paper Piecing, Paper Piercing, Paper Tearing Pin It

July 26, 2010

Hi everyone!  I hope you all had a wonderful weekend.  The weather has finally gotten a lot less humid here in PA and much more bearable.  The card I'm sharing with you today is for today's CAS splitcoast challenge.

This week's clean & simple challenge is a theme challenged based on the Dr. Seuss book, One Fish Two Fish Red Fish Blue Fish.  The only thing that kept rolling in my mind was this cat image and the little fishes stamp in this set.

I first stamped the cat image using black Stazon.  Next, I stamped the little fish, (one red one and one blue one) right next to the cat image.   I used my white gel pen to give the fish a dot for their eyes.

My real red card stock is stamped repeatedly using real red ink and the little paw stamp from this same set.

I used my eyelet border punch for the edging along the bottom of my brilliant blue layer.  Once I was finished with my card I decided to add a bit of doodling all along the edges of my main stamped panel.

I hope you like my card; at first I wasn't quite sure about the red and blue together, but I wanted to sort of go along with the theme of today's challenge.  I think my sister would love to receive this card, she's a cat lover!

Be sure to stop on by tomorrow, I will be posting a card I made for the current Bugaboo stamps blog challenge.

Stamps:  C is for Cat
Card Stock: White, Real Red, Brilliant Blue, Blue & White DP
Ink: Black Stazon, Real Red, Brilliant Blue
Supplies:  Ribbon, Eyelet Border Punch, 1" Circle Punch, 1 1/4" Circle Punch, White Gel Pen -for fish's eyes, SU Marker for doodling Pin It

My First Blog Giveaway!

This week's Splitcoast's clean & simple challenge is a real easy one.  If you have time be sure to check it out.  The challenge can be found here.  The challenge this week is to create a CAS card using dry embossing.

I use embossing on a lot of my cards.  It's such an easy way to add that 'wow' factor or to add just a little something extra without over doing it.  My cuttlebug is one of my most used tools and I just love it!

I originally made one card of these cards and I then I really liked the way it turned out. 

These literally took only minutes to make, so I decided to keep going and I make an entire set of cards (in different colors).  I was planning on doing 3 birthday, 3 thinking of you, and 3 thank you cards, but I ended up using a few different sentiments from SU's Warmest Regards stamp set.


I ran the upper portion of my card stock through my cuttlebug machine and then I tied on the ribbon.  Next I colored just the centers of the embossed flowers using my SU markers, and then I added my sentiment- so quick and easy!

And what am I going to do with all of these cards you ask?  Well, I've decided that it's time to have my very first blog give away and the prize will be this set of cards, with envelopes of course. 

All you need to do to win is to leave a comment for me here in this post (I'd love to have you as a follower as well, but it's not required). 

I will be drawing a winner one week from today on Monday morning, July 19th.  I will contact the winner (and I'll post it on my blog as well) and then I'll get these cards in the mail. Everyone is welcome to play along, I will ship outside of the US.  Good Luck and thanks for stopping by!

Below is a close up photo of one of my cards.  And I have individual photos of all of these cards posted here in my Splitcoast gallery.


Stamps: Warmest Regards
Card Stock: White
Ink: Black Stazon
Supplies: Cuttlebug, SU's Petals-A-Plenty Embossing Folder, SU Markers, Ribbon, Stamp-a-ma-jig
Technique: Dry Embossing Pin It

June 1, 2010


WOW!  It's hard to believe that it's June already.  Summer is certainly here and it sure was a hot one today.

I'm very excited to share with all of you that I have been chosen as a Guest Digi DT member for FireCracker Designs by Pamela. She has some beautiful digi images, so be sure to stop on by and check them out!

The card I am posting today is one that I made for a previous CAS challenge on Splitocast stampers.  The challenge was to create a shabby chic CAS card. 

I had to take a moment to look this one up; I wasn't sure exactly what shabby chic was.  I'm thinking that this isn't quite my style of card making.  I'm not very good at making distress cards, but I wanted to give this challenge a try.

I decided to use my Roses in Winter stamp set.  I created my main image panel using Pretty in Pink for the flowers, and Mellow Moss for the leaves.  On some parts of my images I stamped off first to make them appear lighter in color. 

I randomly stamped my roses and leaves all over my card stock.  Then using the small splatter stamp from the Itty Bitty Backgrounds stamp set, I stamped all over everything using So Saffron ink.  I did this to help create more of a distressed look.  I also distressed the edges of my Pretty in Pink layer using my scissors.

Thanks so much for taking the time to stop by!  Have a great day and be sure to stop on by tomorrow!

Stamps: Roses in Winter, Itty Bitty Backgrounds
Card Stock: White, Mellow Moss, Pretty in Pink
Ink: Mellow Moss, Pretty in Pink, So Saffron
Supplies: Ribbon, MS Lace Border Punch, Scissors
Technique: 2 Step Stampin, Distressing Pin It

May 13, 2010

Just the other day I came across a great blog that I wanted to share with everyone. 

It's called the CAS-tastic Challenge and there are weekly clean and simple card challenges.  Here is the link to this blog.

So as many of you are aware, I'm a huge CAS fan and I just had to make a card for this challenge.

This week's CAS challenge was to create a CAS card with circles on it.  I really had to think about how I wanted to incorporate circles in a card and I sort of think this works.

All of my images were colored using my SU markers.  Then I punched out my images and layers using my SU circle punches.  My center image was cut using my circle scissors plus- I'm finally getting the hang of that thing....LOL

Just along the bottom of my card I added two rows of paper piercing.  I've been doing that a lot lately, I know, but I love the results from such an easy and quick technique. 

I decided not to stamp a sentiment on this card, sometimes I just leave off a sentiment so that I could use this card for several different occasions.

Thanks for stopping by and be sure to check out the CAs-tastic website!

Stamps: Of The Earth
Card Stock: White, Certainly Celery, Rose Red, Regal Rose
Ink: None
Supplies: Ribbon, 1 3/8" & 1 1/4" SU Circle Punches, Circle Scissors Plus, SU Markers, SU Mat Pack, Paper Piercing Tool
Technique: Paper Piercing Pin It

May 2, 2010

Hi everyone!

I hope you all had a great weekend. My children are starting to feel better now; my younger two children were pretty sick last week. My family and I spent the day cleaning and working in the yard. It was a beautiful day, a little warm, but still pretty nice.

Here's my card for tomorrow's CAS clean & simple challenge. This week's challenge was to create a mother's day card with a flower or flowers on it.

I wanted to try and use my new Fifth Avenue Floral stamp set. This was a really quick and easy card to make, it would be really easy to stamp an entire sheet of card stock with these flowers, in all sorts of colors, and use it to make several cards at once (otherwise known as a one sheet wonder or osw).

I have a few horizontal score lines in the upper half of my background (it might be hard to see in my photo). My sentiment is punched using the large oval punch; I guess should have it layered onto a piece of tempting turquoise layer. 

I used my scallop trim border punch along the bottom of my turquoise layer.

Hubby doesn't like this card at all, he says I should throw it in the garbage, what a meanie.....LOL But oh well, I decided to post is anyway. I hope you liked it! Thanks for stopping by!

Stamps: Fifth Avenue Floral, Well Scripted
Card Stock: White, Tempting Turquoise
Ink: Tempting Turquoise, Orchid Opulence, Pink Passion
Supplies: Ribbon, Large Oval Punch, Scallop Trim Border Punch, Scor-pal
Technique: Dry Embossing Pin It

April 26, 2010

Here's a card that I made for today's clean & simple Splitcoast challenge. 

Today's challenge was to make a birthday card using the color orange. 

When I was thinking of the color orange I kept thinking of these flowers.  Even though my card doesn't have a lot of white space, I'm thinking it's still clean and simple, well I know it was simple...LOL 

I also made this card for today's try a new technique challenge.  This challenge was to take one of our cards and either make it a more clean and simple card or make it a 'more' card.  I chose this card from my splitcoast gallery and I made it a more clean and simple card.  In making it a more clean and simple card I decided to eliminated two layers, one flower, and the buckle; although I did add the sponging.

This is a super easy card that can be made in just minutes.  I simply colored the flower stamp and then stamped it onto my card stock. 

Next, I stamped some of the grass, but after I inked up my grass stamp I stamped it off onto scrap paper first and then I stamped it over my flower image.  I wanted the grass to appear a little lighter.

I was going to leave my background blank, but then I changed my mind and I ended up sponging my background.  My clouds were made using a punched scallop circle and I my sponge.  I didn't even do any masking with my sponging; I just sponged around my flowers, super quick and easy.

Stamps: Inspired By Nature
Card Stock: White
Ink: Chocolate Chip, Old Olive, Bashful Blue
Supplies: Ribbon, SU Markers, Scallop Oval Punch
Technique: Sponging Pin It

April 19, 2010


It's Monday again; doesn't the weekend go by so fast?!

And as usual it's time for another CAS (clean & simple) splitcoast challenge.

This week's CAS challenge is a sketch challenge based on Alanna's card shown here.

I also made this card for today's Try a New Technique challenge on splitcoast. Today's challenge was to find ways to use pierce our card. The piercing on my card is on my background. I made a few score lines using my scor-pal and in-between a few of the lines I did some paper piercing.

I colored my flower stamp using my SU markers and then I stamped it onto my card stock. Next I punched out the images and layered them onto my punched Certainly Celery layer. I made a card similar to this a few weeks ago and I had this card in mind when I made my card today.

I'm sorry that my picture isn't very good; I had a hard time getting a nice photo this morning. Have a great rest of the day! Thanks for stopping by!

Stamps: Pocket Silhouettes, Warmest Regards
Card Stock: White, Certainly Celery
Ink: Black Stazon
Supplies: Ribbon, SU Mat Pack, Paper Piercing Tool, Large Oval Punch, Scallop Oval Punch, Scor-pal, SU Markers, Stamp-a-ma-jig, Dimensionals
Technique: Paper Piercing Pin It